![]()
The Report Wizard allows you to create reports of two kinds - standard reports and label reports. To create a label report, invoke the Report Wizard dialog and choose the Label Report option on the Welcome page.
After completing the Label Report wizard, you will get a blank report that generates labels of a particular size. Since the report designer will clearly indicate the label area, you can then populate this area with the required content and print out your labels.
Purpose
When you need to print out stickers or, say, water-proof labels, you need to purchase the appropriate paper. Every supplier will provide it's own specific label size or label position within a paper sheet. To make it easier for you to produce labels, this wizard step lists several label paper suppliers and their products. Once you've selected a supplier and a product (paper and label type), the report will change its settings so that your labels will be printed exactly where they're supposed to, without you having to adjust the label position and size manually.
Page Interface
On this page, choose the supplier from the Label Products combo box and a particular product from the Product Number list. The box on the left-hand side will be updated to show you label dimensions for the currently selected product.
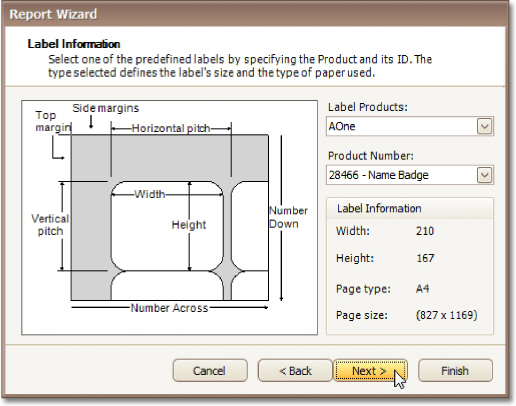
If you don't need further customization, click Finish to complete the report adjustment. If manual correction of label or paper size is required, click Next.
Step 2 - Customize Label Options
Purpose
On this page, you can manually adjust settings that were automatically specified in the previous step, based on your supplier and product choice.
Page Interface
Editors on this page allow free customization of all parameters specified on the previous page. The pane on the left-hand side provides a label dimensions preview based on current values.
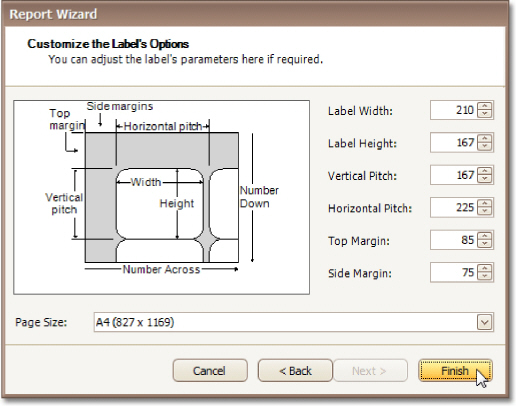
Click Finish to complete report setup.